
Journals
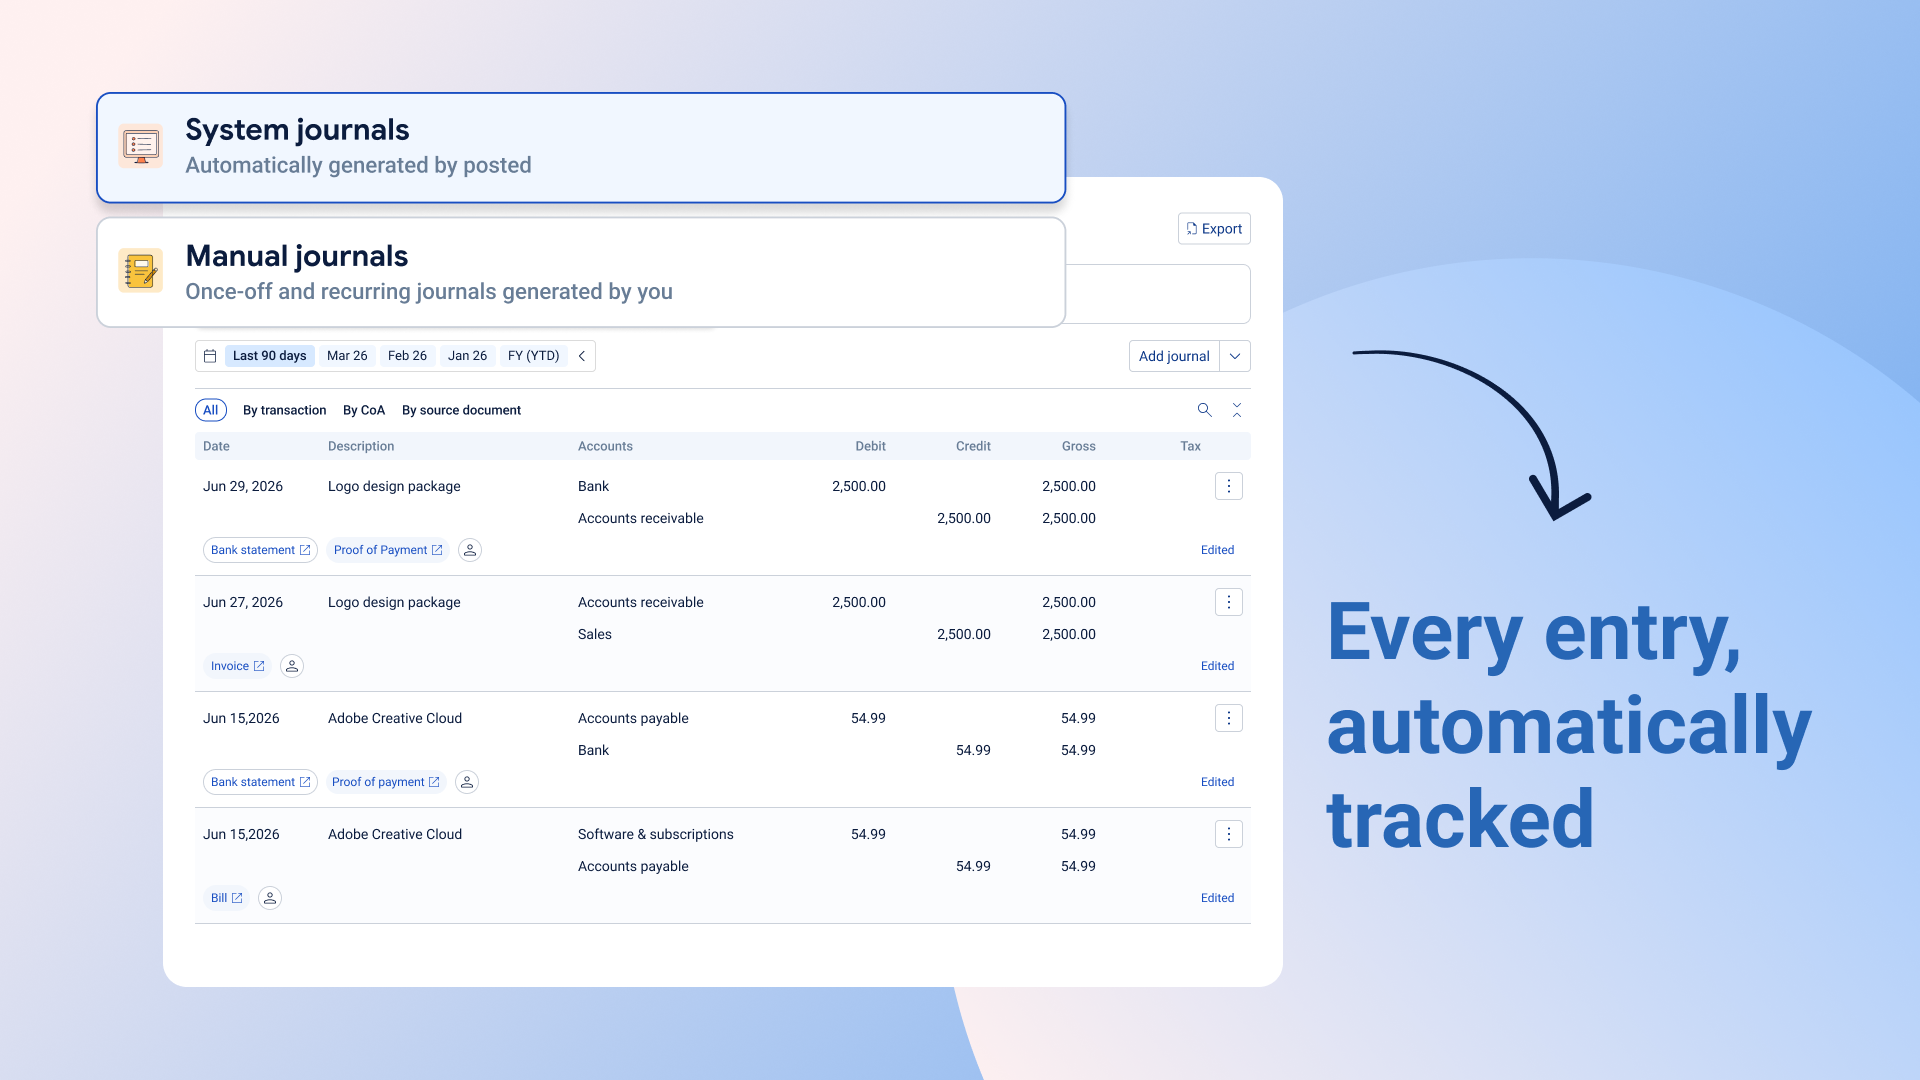
Journals is the full accounting record behind your books. Where your transaction list shows the day-to-day cash coming in and going out, Journals shows the complete picture behind each one, and it's also where you can add entries of your own.
Where to find it
Open Journals from the left nav, under Accounting.
The views
Journals is split into three cards at the top of the page:
System journals (the default view). Every transaction that lands in your transaction list automatically creates an entry here. You don't create these yourself, but you can adjust the details or remove one if it needs to change.
Manual journals. Entries you add yourself, for things that don't come from a transaction, like an adjustment or a reclassification with no underlying document. Anything you add here also shows up in your transaction list, flagged so you can always trace it back.
Advanced journals. A dedicated space for more advanced entries, like prepaid expenses and recognizing revenue over time.
Finding what you need
Pick a date range from the presets (last 90 days, this month, the last two months, or the year to date) or set a custom one. The filter tabs change depending on which view you're in, letting you group entries by transaction, account, or source document. Search looks across journal names, accounts, descriptions, contacts, and amounts.
Switch between a collapsed view (just the entries) and an expanded one, which shows every line of a multi-line entry stacked underneath it.
Reading an entry
Each row shows the date, a description, the accounts involved, the debit and credit amounts, and the total including tax. Below each entry, you'll see chips for anything linked to it: the source document (click to open it or jump to the email it came from), who it's assigned to, and any note attached.
If an entry has been edited, or posted into a period you've already closed, you'll see a small tag saying so, hover over it for the full history of what changed and when.
Use the three-dot menu on any entry to edit it, jump to it in your transaction list, or remove it.
Adding an entry yourself
Click "Add journal," then "Once-off journal." From there, you can drop in a document and let Posted read it and fill in the details for you, or enter everything by hand.
Give it a date (you can backdate it if needed) and, for each line, pick an account and enter the amount as either a debit or a credit, whichever matches how that line affects the account. Add as many lines as the entry needs. The debits and credits across the whole entry need to add up to the same total before you can post it. You can also add a note, link it to a contact, or tag it, all optional.
Editing an entry
Any entry, whether Posted created it automatically or you added it yourself, can be edited from its three-dot menu. Since a journal entry and its matching transaction are two views of the same thing, changing one updates the other, so your books stay consistent. You'll see a note that the entry's been edited, with the details available if you want to check what changed.